Check Printer Setup
Designated Check Printer Setup Instructions
The Printer that you have received is for the sole purpose of printing checks from the Fairwater System. You are being supplied with a special Toner Cartridge for this purpose. The printer is not intended, and should not be used, for any other Printing needs.
You should keep Blank Check stock in the Printer. It does not require you to secure the check stock like you did in the past.
Printer Setup for designated Check Printer.
- After unboxing the Printer remove the Toner Cartridge and insert the new MICR Toner Cartridge.
- Store the Toner Cartridge that came with the Printer, it will only be needed in emergencies
- Plug in the Printer Power Cord and Network Cable.
- Go to Printer Setup – Network Setup – General Settings – Show IP address (check YES). Use arrow button to scroll to Network Setup (OK) – Ethernet Settings (OK) – IP Settings (OK) – DHCP (check YES)
- On the Printer screen note the IP Address displayed (###.##.###.###)
- If the IP Address does not display contact the Help Desk at 251-661-2118
- Go to your computer and open a Web Browser (Chrome or Firefox).
- Type the IP Address that you got in Step 3 into the Address bar and press enter.
- Select the Web Service tab – will show as no enabled – click CONTINUE to enable.
- From the same screen, HP Web Services Tab, click “Print Info Page”. This will send to your new printer.
- Clearly write your Office Name on the Information Sheet that printed. Scan and Email this to wregan@nextlevelstudio.com.
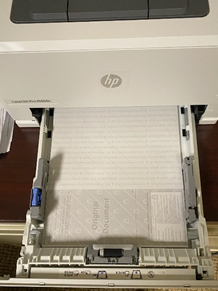
- Load the Blank Check stock into Tray 2 of the Printer. See the picture below to properly face the paper in the Tray.
- Next Level Studio will notify you when they complete the setup and you can Print Checks from Fairwater.

Below is a sample Information Sheet that needs to be sent to wregan@nextlevelstudio.com.
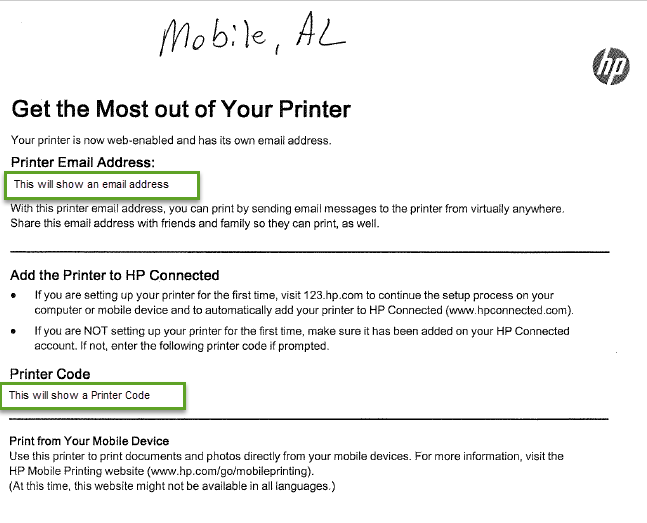
Below for reference only:
